Sunday, September 30, 2012

Day 15: Crochet Dish Cloth

Today's project, crochet dish cloth, I love! I started making these a few months ago to use as gifts for Christmas. I have been using one in my own kitchen to see how well they worked and it has become my favorite dish cloth. Yes, I have a favorite dish cloth.
These cloths are small and could actually be used as trivets if that is how you preferred to use them. Because they are small they fit well in glasses.
 
There are little crocheted knots on this rag which gives this cloth awesome scrub ability!
This is a good pattern and very simple! Just a note, you MUST use 100% cotton yarn for this project.
 
Pin It

Saturday, September 29, 2012

Day 14: Thanksgiving Day Plaque

Yay for Saturday! I think we could all use 2 Saturday's in a week!
Today was a good day. I was able to attend my sister's crafting party this afternoon which was a lot of fun. We made really cute paper crafts that she had seen on pintrest.
 
 
After the party I went to work finishing my Thanksgiving plaque. I started this project by picking the colored paint I wanted to use and painting my old canvas.

 
After the canvas dried I used stencils to outline the word "thanksgiving" going down the left side of the canvas.
 
 
I also lightly lined my canvas with a pencil and free handed the saying I wanted on it in cursive.
You can erase pencil very easily on canvas. Next, I painted.
The sides of the canvas that I used were messed up so I added ribbon to the edges.
 
My painting was a little rough so I outlined everything with a sharpie to clean up edges and make the words stand out better.
 
 
It rained all day long which really put me in the mood for fall so this project was very timely!
 
 
Pin It

Friday, September 28, 2012

Day 13: Crochet Angry Bird Piggy Hat

I wanted to make an angry bird piggy hat as a gift for Landon for Christmas. I started this project at the first of the week only to once again find out that the pattern size was not as big as it said it was. I ended up having to take nearly 3 days of work out and start again. That set me back a lot! I didn't manage to finish the hat before midnight tonight but I came close.
This pattern was not clear and would be very difficult to understand if you are new at following crochet patterns.
The pattern says it is an adult size but turned out more like an infant size. I ended up adding 3 more rounds of increase with one even round between every increase round.
When making the ear flaps you should chain 1 at the end of each row so that your rows will turn out even. When making the second ear flap find the center of the opposite side of the hat and count 8 stitches back. Join, and continue ear flap pattern.
There are so many little extras on this hat that it actually took me a couple of hours to make them all and sew them to the hat.
I attached all of the pieces and added a braided fringe to the ear flaps.
I think it was worth being up late a couple of nights. Landon will love it! Pin It

Week 3 Project List

Sunday Sep. 30 - Crochet Dish Cloth
Monday Oct. 1 - BBQ Towel Set
Tuesday Oct. 2- T-Shirt Dress (no tutorial- I will be making a young girls size 10. You will need a large girls t-shirt, and a 1 1/2 yards of contrasting cotton material)
Wednesday Oct. 3- Owl Ornament
Thursday Oct. 4- Flat Bottom Zipper Bag
Friday Oct. 5 - Elmo Hat
Saturday Oct. 6 - Snickerdoodle Cookies

HAVE FUN CRAFTING!


Pin It

Thursday, September 27, 2012

Day 12: Button Tree Ornament

Today life happened and time ran very short. When I finally got around to working on my project for today I only had an hour to complete it before we had to leave for a football game. We try to make it to all the football games that any kids from our church are in, in an effort to be involved in their lives. Honestly, we will probably still go after they all graduate just because Pete likes it so much!
Anyway, this didn't leave me enough time to paint my Thanksgiving plaque.
So, I scrambled around for a few minutes trying to decide what to do. I didn't want to miss a day but I still wanted to stick pretty close to my list. Thankfully, God knew at the beginning of the week that I wasn't going to have time today to paint a plaque and He guided me to put a super simple project on my list for Saturday, the button tree ornament. He really amazes me so often, that He would even care about something so small. But, He knew it would stress me out and made a plan for me!
 So I ran around the house looking for buttons. I thought I had a lot of buttons but all that I could find was flower buttons.
I picked out all the green buttons and one yellow to make the star on top. Then I couldn't remember if I had thin wire. Dani came home about that time and she had some thin wire sticks which turned out to work perfectly. I halved a stick and began stringing  the green buttons bigger buttons to smaller buttons.
After I stacked enough buttons to look like a Christmas tree I had decide how to but the star on. I finally threaded one side of the yellow flower button taking it to the top of the tree. Then, using the same wire that was threaded through the first hole I pulled it through the second hole. This was a little difficult because you have to hold the button in place and pull at the same time so that the button doesn't move. A second set of hands may be helpful here.
 
 
To finish I used pliers and made a little heart hanger at the top.
I LOVED how this turned out! I think the flower buttons made it even better than Martha's!
Pin It

Wednesday, September 26, 2012

Day 11: Cinnamon Ornament

Bringing all the Christmas decorations out of storage and unwrapping each decoration, reliving every memory that is carried in each one is a special tradition. Growing up, one of my favorite ornaments to unwrap was the cinnamon ornament. It just smelled so good! It was a game every year to see if it held its fragrance. It always smelled just as cinnamony as it did the year before. I knew I had to make one of these for Landon to enjoy.
I started with 1 cup ground cinnamon, a 4 oz bottle of white glue (I bought the cheapest they had, about $0.34), and 1/4 cup apple sauce.

First, stir the cinnamon  and apple sauce together until combined. It will be crumbly. Next, add the glue and stir until you can't anymore. Pour out and knead until you have a soft dough.
 
Let the dough set for an hour then roll out to about 1/4 in. thick.
Landon had fun helping!
 
 
We found small Christmas cookie cutters and decided to use them to make cinnamon gift tags.
 
 
We used a pencil to make holes to string ribbon though. Make sure that the hole is big enough for the ribbon on the front and the back of the ornament.
 
 
Let the ornaments dry for 24 hours, turning every 6 hours. Or bake on 200 for 2-3 hours.
 
 
After the ornaments dried we strung ribbon through the hole. We made "THOMPSON" ornaments for our tree. Landon loves these! He keeps talking about how the whole house smells like cinnamon! Fun memories!
 
 
Pin It

Tuesday, September 25, 2012

Day 10: Finger Puppet Kit

10% of my challenge to myself is now completed! I know that sounds small but I am happy with this little milestone. I have been praying everyday that the Lord would help me to have time to complete my projects and He has been very faithful to do so! I love it when God cares about the little things in my life!
Todays project was a finger puppet kit. I had a lot of fun making this! Or, not making it I guess since it was more gathering things for someone else to make.
These are for Landon and his cousin Kai's stockings. They both love being creative and I thought this would be something that would really hold their intrest. I also liked that it doesn't really look homemade but more like something you would find in a novelty store.
I started by downloading and printing the pillow box template from the Craft Nest website (the previous link goes directly to this site). I was so excited about how cute this template was and that I actually had colored ink in my printer to print it!

The instructions said to cut the fingers off of old cotton gloves. I couldn't find any gloves around the house but I did find some mittens that I will never wear.
 
I cut the thumbs off of the mittens to use as puppets. One of each color for Landon and Kai. The striped mitt had pink on it and I didn't think Landon would really appreciate that. So, I used a green permenate marker and colored the pink stripes on Landon's puppet.
 
I raided my craft shelves and came up with a lot of little stuff to put in these kits.
~ 2 different colors of twine
~ yarn
~ 3 differnt colors of felt
~ 6 sets of google eyes (in case they lose 1 or 2)
~ fingers from the mitts
~ buttons
~ foam
~ 2 sizes of pom poms
~ ribbon
~ little shells (Landon's)
~ Paper flowers (Kai's)


I assembled the pillow boxes. Placed all of the goodies in a sandwhich bag (one for each of them). Then put the sandwhich bags in the cute boxes and DONE! So easy! So cute!
 
 
And... In the spirit of "waist not, want not", here is what I did with what was left of the mittens and the felt.
 
And this project cost me nothing! Everything used was oddes and ends from other projects. Got to love it!
Pin It

Monday, September 24, 2012

Day 9: Maston Jar Candle

Today's project was mason jar candles. But, before I could work on candles something had to be done about our house! I would love for you all to think I am superwoman, not that I could even fake that! But, I have to say that in the mist of all of my crafting our house has become very messy, even for me. Consequently, today had to be a cleaning day!
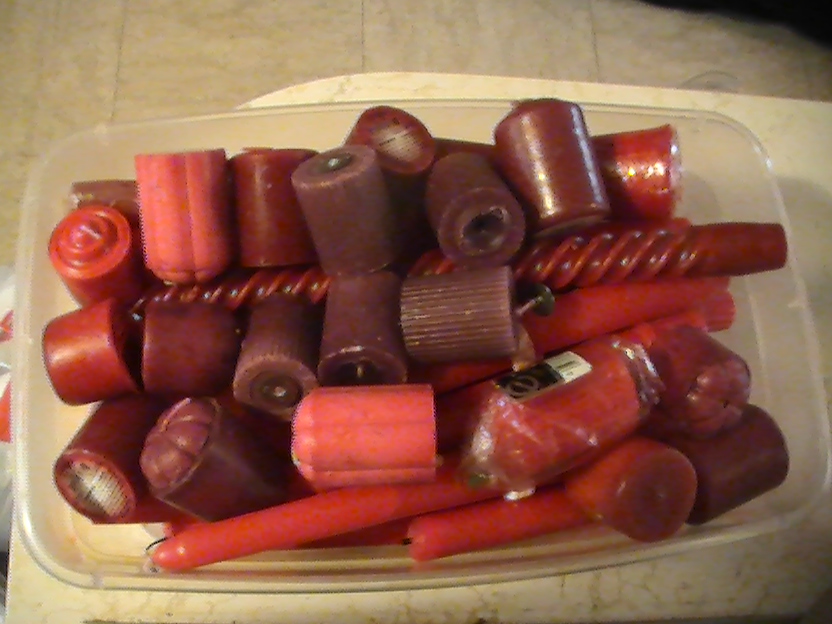
After things were somewhat back to normal I began today's project. I still have so many candles that were given to me so I began by picking out the color candles I wanted to turn into mason jar candles.

I chopped up the candles and removed the wicks, salvaging 10 of the long wicks to use for the jar candles. I set up my double boiler and began melting the wax.
While I waited for the wax to melt I set up my mason jars and wicks. I wrapped each wick around a pencil making sure to keep it long enough to reach the bottom of the jar. I placed the pencil on the top of the jar and centered the wick.
 
I worried about the wick not staying in place after filling the jar with wax but it seems to have worked fine.
The last candle I melted down held its scent well, but since I am planning on using these for gifts I added some Cinnamon apple essential oil.
 
I used a silicone ladle to pour the hot wax into each jar. A few times I over shot the jar and hit my hand. OUCH!
 
I filled all 10 jars and let them set. All turned out well! They did sink a little in the middle so they will need another pour tomorrow. They didn't cost me anything and they will make really cute gifts!
 
 
**UPDATE**
Today I reheated the wax and made a second pour. Some of the candles had sunk a lot. I think that if I had made some relief holes on each side of the wick that the sink hole would not have been quite as large. The hole filled very nicely on the second pour, although I over filled a few of the candles which made the tops look a little rough. I will save those candles and use them around the house.
After the wax cooled and hardened I trimmed the wick.
 
I was very happy with the end result!
To decorate I found some cute fabric and glued it to each lid with fabric glue. I trimmed it down to size. Next, I tied a small bow out of a contrasting ribbon. When the glue dried I screwed the lid on the top and that was that! I ended up with 6 out of the 10 to give. I am excited, these will make some wonderful gifts!
 
 
Pin It

Sunday, September 23, 2012

Day 8: Heart Oven Mitt

I hope everyone had a great day with the Lord today! We had good services at church this morning and a nice lunch with my sister and her fiance. And this is how I spent my afternoon...
I found a picture of these really cute heart shaped oven mitts online. However I could not find a tutorial for them. So, I decided to make my own tutorial and share it with any of you who wanted to make this as well.
I started by making a pattern for my mitts. Using copy paper I cut 2 hearts large enough to fit my hand comfortably inside. Then, I folded 1 heart in half and starting at the bottom outside of the folded heart I cut up and on an angle ending at the top of the opposite side of the heart. This gives you 2 pieces, 1 to fit on top of  each side of the whole heart.
I also cut a strip of paper about 1 1/2 in. wide and just a little longer than the 2 heart sides.
I picked 2 contrasting fabrics, 1 for the outside and one for the inside of the mitt. Cut 1 whole heart from BOTH the fabrics colors and also the batting. (My batting was thin so I doubled up and cut 2 hearts.) Cut 1 of each of the heart sides out of your outside fabric. Cut 2 of the strips from the inside fabric.
Time to sew. First, I took the heart sides and and strips of contrasting fabric and one at a time sewed the strips to the inside edge of the heart side pieces. Making sure to tuck in raw edges.

I pinned the sides, front facing, on the front of the whole heart cut from the inside fabric and basted.

This next part was tricky. I had to figure out how to stack all of the layers of the mitt. Here is how to do it.
 Lay out the batting layer and stack the whole outside heart, front facing you, directly on top of the batting layer. Next, place the inside heart that you just basted with BACK facing you, directly on top of the other layers. Pin and sew, making sure to leave a large enough hole to turn right side out.
After sewing, and turning, sew up hole and press. Your done! Not that hard! It took very little fabric and will make a cute gift!
 
 
Pin It

Budget up date

I don't have a set budget for this challenge other than trying to keep my expenses as low as possible! So to help me keep track of my expenses I will be posting my total cost per week.
This week I had to spend very little on supplies since most of my projects were planned around what I already had.
I spent $5 on a package of 12x12 towels for the travel towel toothbrush holder, $2 on bias tape for the flower apron, and $1.50 on spray paint for the clothespin wreath. Which brings my total so far to $8.50!
My goal is to keep every week under $10 so I am very happy with this amount!
How did you do this week? Remember to always take into consideration what you have on hand and what you will have to purchase when deciding on gifts and other projects to make. Pin It

Saturday, September 22, 2012

Day 7: Clothespin Wreath

Today was the first day I wasn't very excited about having to do a craft. Last night we went to a high school football game that was about an hour away. On the way home I remembered that Landon's baseball uniform had not been washed and since he had a double header today, I stayed up to wash it. We had to get up fairly early this morning to take Landon to his very first Taekwondo tournament!
After the tournament we had exactly enough time to drive the half hour from the tournament to the baseball games. After they won both baseball games we jumped in the car and headed to church for outreach day. Needless to say we were tired. Crafting a clothespin wreath was not on the top of my wanting to do list!
But I didn't let that stop me.
Yesterday I found some clothespins and bought spray paint. (I was carded and the lady still didn't believe I was 27! That was nice!) We haven't had a diaper box in our house in years! So I had to settle for a small trash bag box to clip the pins on, which worked fine. I spray painted the pins with about two coats. Today I turned the pins upside down and sprayed them again.
Next, I found a wire hanger. It was impressive that I found one because I have a strict white plastic hanger only rule in our closet! The little bit of OCD that I have is shown in our closet.
I used the wire cutter to help me bend the hanger into a circle.

 
I had a mix of different kinds of beads left over from who knows what. I picked out the green ones because I didn't have enough red. Then I began to alternate stringing pins and beads on the wire. You must string the pins through the spring.
 

After filling the whole ring I taped the ends together and went searching for ribbon to make a bow. I found several different ribbons I could have used but didn't like any of them for this project. I finally decided to use the left over bias tape I had from the flower apron earlier this week.

After looking at the picture I realized that I need to straighten out the circle and fluff up the bow, but I was to lazy to do it tonight! It turned out OK though. It will be cute to hang all the Christmas cards on that we receive this year!
I also painted some little clothespins that I found at church so that my children's Sunday school class can make little wreaths to give their parents!
I may have had to make myself start today, but I am glad I did! Pin It

Friday, September 21, 2012

Week 2 Project List

My goal is to put my list of projects for the next week up by  Friday so that any of you who want to craft along with me will be able to make your schedules and have time to pick up your supplies. I barely made it this week!
Here is the list for week 2!

Sunday: Heart Oven Mitts
There is no tutorial for these so I will be putting my own tutorial up. If you want to make this project you will need 2 contrasting fabrics about a 1/4 a yard of each, and batting.

Monday: Mason Jar Candles

Tuesday: Finger Puppet Kit

Wednesday: Cinnamon Ornaments

Thursdays:  Thanksgiving Plaque
There is no tutorial for this either. I will be using a canvas I have, but you can use wood, canvas, or metal, anything you can paint on. My plaque will say "Thank you for the food before us, the friends beside us, and the love between us."
I will be using acrylic paint but you should use paint suited to the surface you are painting. As of right now I am going to be using stencil's unless I can find a cool tutorial for painting nice looking letters.

Friday: Angry Bird Piggy Hat

Saturday: Button Tree Ornament

If you have any questions let me know! Pin It

Day 6: Bobble Beauty Crochet Hat

This was my second attempt to make my friend Cindy the hat I had been promising her for about a year. My project for the 1st day ( urban slouchy beanie) was supposed to be for her but when I finished it I decided it just wasn't good enough. So, I searched the Internet for a new pattern. Last Christmas I had made a slouchy beret for my mom that Cindy loved, but I could not find the pattern for that hat and couldn't remember what it was called or where I had found it. Typical of me. I finally found a pattern I thought would be similar (bobble beauty hat).
I started to crochet this hat on Monday and almost had it completed by Wednesday night. It was so small! I thought and thought about what I could do to make it bigger but finally decided to take it all out and start over.
Pete was watching all of this and kept telling me that he could find the pattern for the hat I had made my mom. I told him that I had looked all over the Internet and couldn't find it and that I was sure he couldn't do any better. He was on his Ipad about 10 Min's before he showed me a pattern he thought was like it. It wasn't like it... it WAS it! I was torn between being happy he found it and not wanting to eat crow.
So, here is the pattern I really used - Slouchy Beret
Cindy wanted fall colors so I chose chocolate brown, tan, and dark turquoise.
This pattern starts at the top of the hat and leaves a good size hole in the top to place the pompom at the top. I did not want to put a pompom on this hat so I used a magic loop to close the gap.

I also switched colors at the band so that I would have more contrast. This is what the hat looked like after I finished the pattern.

It was pretty plain. Time to dress it up! I made a 3D crochet flower out of the turquoise. I made this with 3 layers of petals. (only 2 are pictured)


I still wanted more detail and for the flower to really POP so I outlined the flower leaves with the 2 other colors. I used the tan on the inside and outside layers and the chocolate in the middle. It still wasn't enough so I added a wooden button to the middle of the flower and tacked it on to the side of the hat.
 
Now, it is Cindy worthy!
This project was a lot of fun and I really liked how it turned out. What crochet projects have you completed lately? I would love to see!
Oh and by the way, the pattern that I couldn't find for all that time? After Pete found it on the internet I copied it to the notes on my Ipod and remembered that is where I had left it last year. Hehe, I really need to get organized!
Pin It